NOTE:

I do not make, sell, or traffic in bootleg/recast dolls or any other product.

I do not provide information on where or how to buy them.

Any recast information on this blog is for information purposes only, for identifying recast products on the second hand market.


Showing posts with label dye. Show all posts

Monday, August 1, 2016

iDyepoly Review


Having now dyed a doll with both iDye and RIT I can confidently say I prefer iDye for most BJD applications.

The colors are less accurate, but deeper and richer than you'd think. I was not able to make blue actually come out blue, which seems to be a common problem based on my internet research.

I've never tried to get blue from RIT, but I know it can be done.

RIT dye is easier to work with. It's less temperamental, takes more dunks to get a deep rich color so you can more easily control the shade you're going to end up with, and while warm you can kind of blend the color together before the piece dries and the color sets.

However, RIT dye rubs off pretty easily. I've gotten the majority of RIT off a resin piece with little more than a Magic Eraser sponge with some acetone.

Pink RIT powder dye on Recast Aileen Doll Ashes (Minion)

Monday, September 15, 2014

When Dye Jobs Go Wrong


trouble 2


Sometimes it happens. For the first time, it happened to me! I have a few theories about why this one went bad:

  • My pan may not have been perfectly clean
  • There may have been sealant residue or residue from the cleaning product used to remove the face up
  • Mold release/odd sanding (as this has kinda happened on my other dragons)

Darker colors seems to be  more difficult to dye correctly. I want to test a few more pieces out with darker colors to see what happens. *goes on the hunt for recast spare parts*

I had little to no issue with the pinks and even the dark, dark purple on Grim's parts, so it has to be something more than just the dye itself. In any case, I'm not too worried. The only reason I dyed it as a base was because I didn't want to have to struggle to airbrush the super tiny parts on Penny. It'll be much easier now that they're dyed.

A Summary of the Issues:

trouble

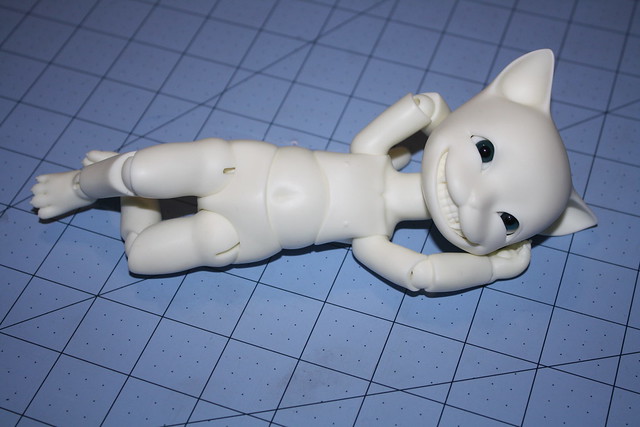
  1. This weird splotchy part on the face
  2. This cool scale-like pattern on both legs (I'll be incorporating this because it looks cool)
  3. Weird, brown stain, only on the belly. Wondering if it burnt slightly? Not a clue on this one.
  4. Uneven coloring, common along seam lines, sanded areas, and areas with mold release. 

To fix this dye job, I'm going to be airbrush it!

If you don't have an airbrush, I'd suggest going the My Little Pony customizing route and begin layering thinned acrylic over the top. Use light layers and let them dry thoroughly in order to avoid streaking. Seal it well (one to coats of mod podge and Army Painter), and then blush and add details as normal. You could also attempt to remove the dye with a good soak in a cleaner or scrub it down and try it again.

I can see how someone who didn't know what to expect or encountered this on their first try would be pretty upset. I'm not upset at all, but then I have the tool to easily fix it. My suggestion is that if this happens to you, be in good spirits about it. How can you incorporate the weird parts into your overall design? What can you do to cover it? Take everything in stride, and just relax. It's all mostly fixable!

I'll update after I've finished the airbrushing. Stay tuned!

Sunday, August 17, 2014

My Dye Removal Experience

So I finally have an experience with removing dye. This isn't exactly an experiment, and I have no immediate plans to replicate this any time soon, so your mileage may very.

Additional note: Grim is a recast. He among the last I own (only my dragons and him remain). Please don't share this where they aren't welcome.

Grim here was really looking rough. He was my first dye experiment (click here for how I did it then, and then here for an updated dyeing tutorial), and one of my early attempts at body blushing. I didn't have an airbrush then, and overall I'm still pretty proud of the work I did with only pastels.

He has two eyes here to show different sizes. 16mm green mako, and 18mm MoC blue glass.

Sunday, December 15, 2013

Another bjd dyeing tutorial- this time with LOTS of pictures

[Note blogger was being stupid and I can't seem to get rid of some of the weird linking. T___T]

Minion needed to be pink. I bought two boxes of RIT Petal Pink for this project.

Time needed: 1-3 hours
(Depends on your water to dye ratio, the size of your pot and amount of pieces you're going to fit in there, and how vibrant you want your color.)

Okay, so see this post here for materials and stuff. I tried to take much better pics this time.

Warnings:

  • This is pretty much permanent. I don't recommend this unless you're a fairly seasoned modder or have an easily replaceable doll just in case something goes wrong.
  • Someone asked me why their dye turned their doll a bizarre gray color- I don't have an answer for that, but I do think it either had to do with the metal in their pot or that the dye was old.
  • Some areas aren't going to take the dye evenly, and some will end up darker and lighter than others. How noticeable this is depends on how saturated your color is. You can usually hide this via blushing, but I think it adds character.
  • Wear and tear is going to happen, and the dye, just like paint, will wear away over time. You'll have to do touch ups on occasion if this bothers you.

Thursday, November 1, 2012

A Mostly Text BJD Dyeing Tutorial


This is a mostly text tutorial for how I dyed a recast Pipos Cheshire cat, named Grimalkin, or Big Brother Grim. He began white-skinned:

Cheshire Project