Minion needed to be pink. I bought two boxes of RIT Petal Pink for this project.
Time needed: 1-3 hours
(Depends on your water to dye ratio, the size of your pot and amount of pieces you're going to fit in there, and how vibrant you want your color.)
Okay, so see this post here for materials and stuff. I tried to take much better pics this time.
Warnings:
- This is pretty much permanent. I don't recommend this unless you're a fairly seasoned modder or have an easily replaceable doll just in case something goes wrong.
- Someone asked me why their dye turned their doll a bizarre gray color- I don't have an answer for that, but I do think it either had to do with the metal in their pot or that the dye was old.
- Some areas aren't going to take the dye evenly, and some will end up darker and lighter than others. How noticeable this is depends on how saturated your color is. You can usually hide this via blushing, but I think it adds character.
- Wear and tear is going to happen, and the dye, just like paint, will wear away over time. You'll have to do touch ups on occasion if this bothers you.

You are also going to see some stuff that looks like little blobs, streaks, or even flakes of dye. Rinse the part, then take a paper towel and gently blend and rub until these marks go away. Usually they will, but occassioanlly you'll get a line or dot that won't go away. You just have to work with that.

Okay, moving on!
Some stuff you might need:
 |
| This is our dining table. It has become our project table. |
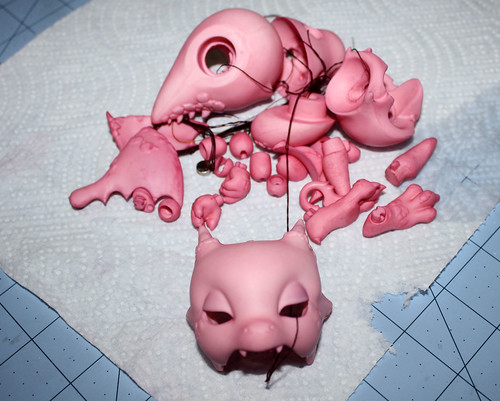
Got all that? Now take your doll apart. Pay attention to how he's put together. Not sure how to restring? Check out the restringing tutorials on this blog. There will be a tutorial for how to put Ashes back together next week. The restringing page isn't always up to date, so be sure to check for recent posts or use the search option. :)

Prepare your workspace. I lay down newspaper on the floor below where I'll be drying big pieces and all over the countertops. Dye will stain your counters. If you get it on something, wipe it off as quick as you can to avoid staining.

See these? These are the instructions. Read the instructions thoroughly. On RIT dye, they are inside the box, so be careful when you open it.

I mix the dye like this:
Mix just enough water to cover the biggest part of the doll (usually a few cups) with 1-2 packets of powered RIT dye.
I don't know the measurements for liquid, as I've only used powder.
Bring to a boil, stirring constantly. Reduce the heat, but keep it real hot. You want to see bubbles.
Just enough water to cover, but you will need to add more water. Some will boil out. Notice I have a string tied loosely around the piece to help me hold it.

Got your dye mixed?

Grim: Here ya go! Let's dunk him.
Amaranth (me): Nope not yet. First we need to test it.

Rinse your test piece...

And check the color.

This was only after about 3 minutes. The color is definitely not dark enough, so in it goes. I just do this every few minutes, rinsing between checks and rubbing away those little dark marks that sometimes appear.
I realized it was going to take about 10-20 minutes to get the pieces the shade I wanted. I actually went a little too dark, but it worked out.
For the little pieces that I can't use string with, I take them in a group and put them in something like a flour sifter. I stir them often to keep the color even and prevent them from burning or warping.


First dunk, picture taken at about 5 minutes:

Clearly not long enough, so I don't bother to rinse since they have no dark spots. I dunk them again. Next picture is taken at about 10 minutes total, 5 minutes from the last picture.

These look good. I rinse, rub away the weird coloration, and set them out to dry. If they need longer after this, you can always dunk them again. Remember, you can always go darker, but it's much harder to go lighter.

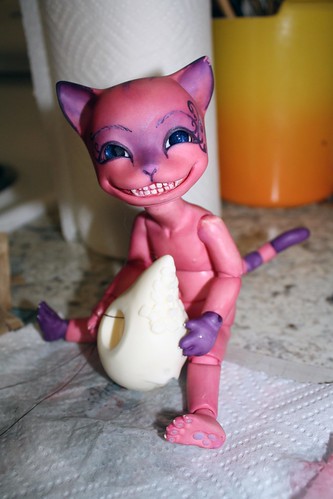
Now for the big pieces. These took much longer, about 30 minutes or more. They stayed lighter than the smaller pieces, and for some reason the edges of his tummy did not take much color. I think this is because of sanding or mold release.

Keep your threads away from the burner or they'll catch fire. Don't ask me how I know. I just do. Though I didn't need to for this doll, you will use those threads to hang the pieces up to dry, on something like a hanger.

And there you have it! I've got lots more work to do on him, but it's going to be fun. I hope this tutorial was more helpful than the last one.
Thanks for reading!
No comments:
Post a Comment
Thanks for reading! <3 I try to follow up on every comment my readers make.