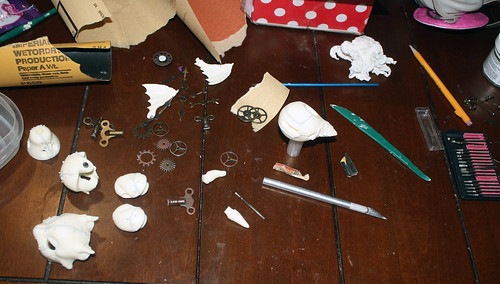
So far my little Lord Hamilton (Gizmo, as Mr. Amaranth calls him) is coming along quite nicely. I wasn't sure I could pull this mod off, but he's really looking great so far. I'm really proud of myself.
Note: There are watermarks on the images because if people are going to use them/steal them, I want those who view them to know where they can come to get real, accurate info regarding the stuff in the pictures.
 |
| Working on my dining room/project table that we never actually dine on. This is my mess. I am not proud of this mess. XD |
List of stuff still to do:
*Dye him a base color
*blush and seal
*paint additional details
*Complete clock-wings
*Finish the goggle/monocle
*Make the top hat
*Order a dragon eye for the right eye
*Is that actually all that's left to do?!! @___@
Stuff that's finished:
*Drilled the main lines to guide my epoxy for the welds.
*Added epoxy weld lines.
*Added little tiny bolts and carved some to look like screws and nuts
*Created the little key hole for the wind-up key.
*Created the main body of the monocle (and each gear is able to turn!)
*Drilled the holes for the moving gears on the outside of the dragon's wings
*Ordered steampunk eye from DDE for his left eye
Total cost of the project so far (ignoring initial investments such as pastels and such, since I use them for other dolls):
dragon- free gift from S/L
steampunk eye from DDE: $17
Epoxy- bought a whole pound on amazon for use with tons of other projects, used maybe $1 worth of it
Steampunk gears and such: about $20 for the lot
Dye: $3-ish
…And I think that's it so far. I'll be using fabric and little top hats and such that I already have in my craft room, so it's very little actual cost. I’m kinda surprised. Total so far on everything is only about $42, give or take a little bit. With the cost of the dragon itself, it'd be more expensive though.
 |
| The little gears and such turn here too. This will be part of his monocle/goggle thing to cover his steampunk eye (e.g. the eye well that shattered). Still have to make the strap for it. |
I once read an article on steampunk and the proliferation of "steampunk"-style clothing and accessories. It talked about the use of gears, and that if they didn't actually move and do stuff, it wasn't actually steampunk. To be steampunk, things needed to be able to move, not just slapped on there.
| from cheezburger.com |
Random semi-related side note:
While I like decorative gears, I do empathize with the point of that article which was essentially a critique on the commercialization of steampunk. So, I tend to admire gears that actually move and work, but I can still like some things that are just there for beauty's sake. I think it's more the spirit behind the creation that makes it steampunk, as opposed to whether or not the gears are functional. Functional, though, is a matter of opinion. For me, I just like that my dragon's gears can move and turn, even if they serve literally no practical purpose. I guess the clock hands could potentially tell the time were it possible to hide a clock battery in a wing a few centimeters thick. (I need steampunk nano-tech.)
I'm also an engineering major (second B.S. degree whoop whoop), so gears and moving things are kinda my thing.
I'm also an engineering major (second B.S. degree whoop whoop), so gears and moving things are kinda my thing.
So, the left wing has one gear that turns another, and the right wing has a "clock" with hands that can turn.
 |
| The gears make the wings really heavy. Since the hook already broke in one wing before it even arrived at my house, I put the heavier set of gears on the more secure wing. |
 |
| Lined the keyhole thingy with epoxy too so that the key won't tear into the soft resin. |
 |
| Frustratingly not perfect enough, but hoping I can fix the annoying spots with sanding and carving. |
Thanks for reading and happy collecting!
No comments:
Post a Comment
Thanks for reading! <3 I try to follow up on every comment my readers make.