Here's my tutorial for making miniature cards, in this case Magic the Gathering cards.

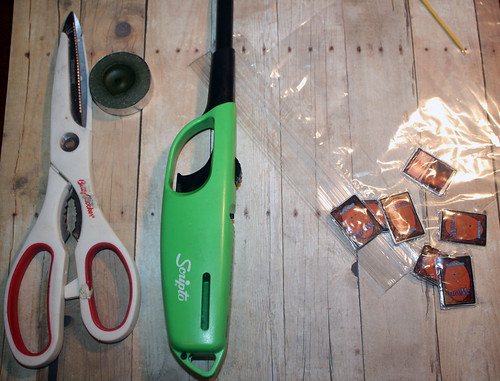
You need:
- Scissors
- Paper
- Make sure your printer has colored ink
- Photoshop or the image file from this blog
- Plastic baggy
- Tape, mod podge, and/or glue
First, make the image files.
You will either need a program that can reduce image size while retaining a high pixel ratio (so photoshop or something), or you'll need to use an already tiny image. I'm not going to do a tutorial on how to shrink them in photoshop unless someone reeeeally wants me to.
Size:
2.2x3.2= human size
.73x1.07 = 1/3 size cards
2.2x3.2= human size
.73x1.07 = 1/3 size cards
.55x.8= 1/4 size
Second, arrange them on the paper.
This is already done for you in the files I've included. I'm sure it is possible to arrange them so that they will print perfectly on front and back, but I didn't bother. It was hard enough doing this for my Magic the Gathering Save the Dates in normal card scale I didn't want to try for these tiny cards.


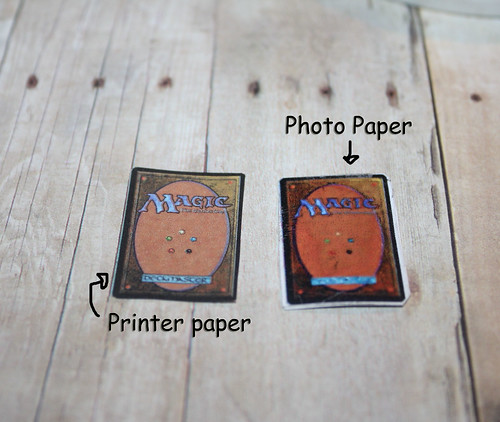
Third, choose your paper.
Photopaper has a great glossy sheen, suitable for cards, but the ink smears. Since you'll need to handle the cards a lot for this tutorial, I wouldn't use it unless you have plenty of time to let it dry.
Cardstock is more durable, but it can make the cards thicker when you glue the fronts to the backs.
Regular printer paper is about perfect, IMO. It's not glossy, but if you'll be making little plastic sleeves or coating them with glossy mod podge that doesn't matter.
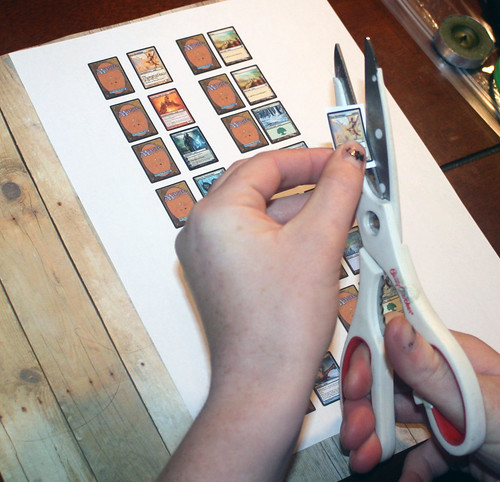
Fourth, print and then cut them out.
Print the best quality you can so they stay nice and legible. When you cut the cards out, pay attention to the borders. Give yourself enough room to trim to make them even. My files are not perfectly lined up, so be careful when quickly cutting.
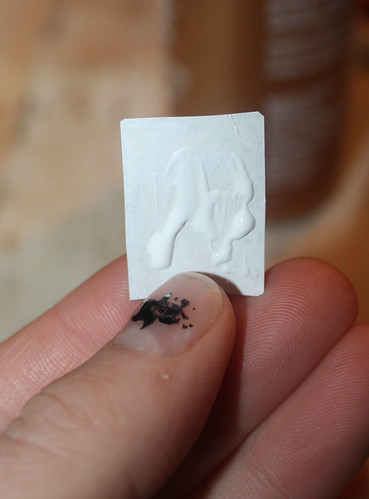
Fifth, glue the fronts and backs together.
You can use mod podge, tacky glue, elmers, whatever. Don't soak it with glue or the paper will dissolve or your ink will smear. You don't need a lot.
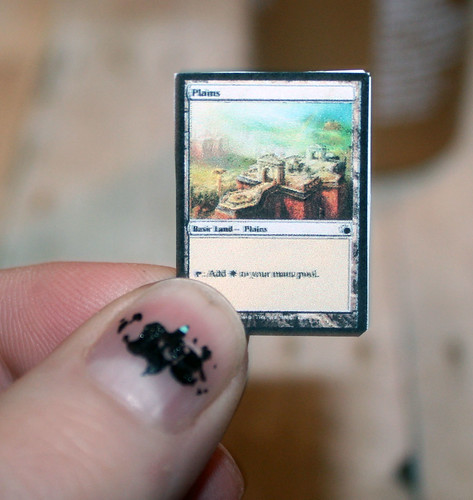
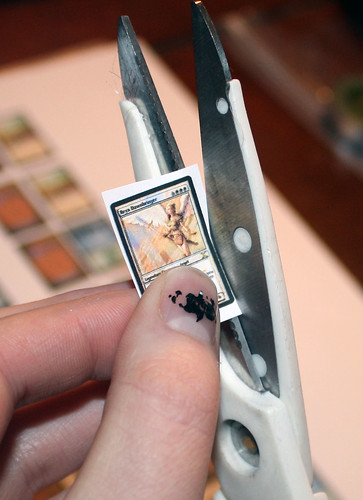
Six, trim.
Six, trim.
When dry, trim the edges so they're as even as possible, and round off your corners.
Seven, coat with mod podge. This is optional.
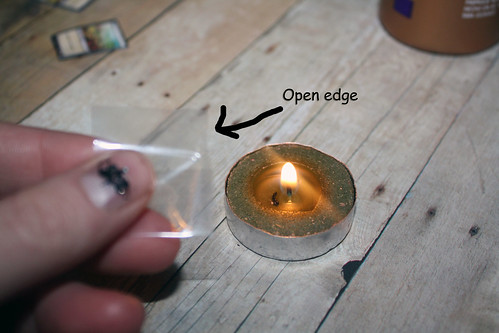
Eight, make the plastic sleeves!
Take a sandwich baggy or other plastic, and cut it to be bigger than the card. You need room to work with.
Use glue or tape to seal the edges of the sleeve, or melt them.
To melt the edges and give that finished, realistic look, light a candle. Hold the plastic near enough to the flame that it starts to melt. Quickly press the warm plastic edges together so they fuse.
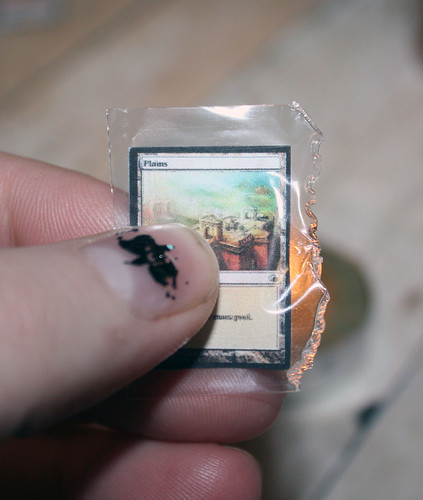 |
| This is what happens if you melt it too much, so be careful not to do this. XD |
Warnings:
- Under 18? Do NOT do this without adult permission.
- Do have a fire extinguisher or water handy.
- You could burn yourself doing this.
- Basically just be smart, please don't light yourself or anything on fire, and you should be fine.
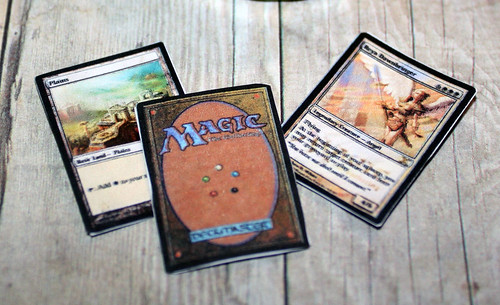
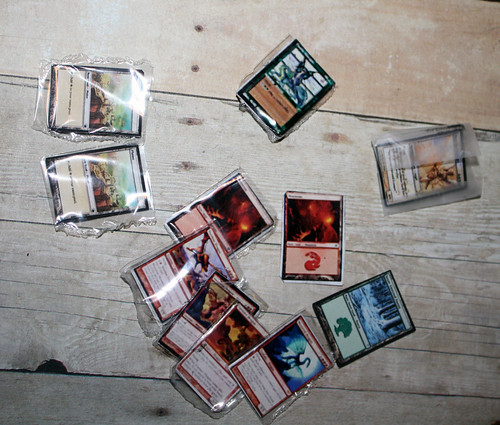
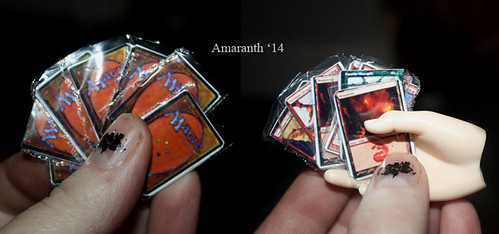
Voila! Tiny Magic the Gathering cards!
Requests for cards? Ask in a comment, and if I have time I'll be sure to do it. I won't be able to do entire decks (I guess that's what etsy's for? XD), but I can do a few here and there.
Jpg file not working? Download the pdf at my dropbox here.
I like them printed on regular paper too. Glad to see the Mod Podge idea worked for you. Thanks for sharing the file.
ReplyDeleteYeah the Mod Podge worked really well. So happy you shared the idea with me (I need to credit you up in there for that idea; sorry I forgot to do that!!).
DeleteGreat! I'm following you from right now! On bloglovin too.
ReplyDeleteI'd like to invite you to visit my brand new blog: Sweet Faery Doll
what the size for 1/6 or smaller?
ReplyDeleteIt should be about .37in x .53in! Let me know if that works out right. ^_^
DeleteCould you make just 5 or 6 cards for me? xD
ReplyDeleteHi there, sorry but I do not have very much time lately. :( If I get some spare time I will definitely consider taking requests for the cards. Please stay tuned.
ReplyDelete