Upcoming:
Part 2: Editing Photos
Part 3: Working with a Cell Phone Camera
My photography has improved over the years I've been in this hobby. Witness this monstrosity from early in my doll collecting career vs this more recent photo:
 |
| On the left is a photo of my first doll, Poe. On the right is Peregrine, who I acquired last year. |
So what improved? How can you kick your photography up a notch? What if you only have a cell phone to work with?
Well, read below for help editing photos in general. A follow up post regarding tips and tricks for cell phone photography is upcoming.
Editing- Ethical or No?
Yes and No. If you are selling a doll, please don't use edited pictures, beyond color correction. This is dishonest and rude to your potential buyers, and could land you in trouble.
However, editing for your own personal use is more than okay. Magazines, movies, professional photographers edit their pictures to improve lighting, color, and composition. I don't view editing a photo as lying. Usually it's highly obvious when someone has over edited a photo. The trick is to stay classy and keep it simple.I'll be doing a post in a couple weeks on editing tricks and suggestions.
Lighting:
Lighting is the most important part of a good photo, no matter what you're using to take that photo with. You want good, natural light. A camera's flash will bounce of the doll's face and wash out areas you need to focus on and overly brighten their pale skin. Flash isn't as harsh on lovely tan colors, but in my experience it does wash out the intensity of tan color.
So what can you do? You can either diffuse the light from a camera flash (such as by holding a piece of paper in front of the flash a few inches to bounce the light and create a softer effect), use lamps carefully arranged to produce a bright area, use big bright windows, or take your precious resins outside. I prefer outdoor photography, especially in an overcast day.
You can usually edit an overly dark photo, but it will always have a slightly grainy quality unless you're reeeeally good at editing (which I'm not haha). It is very hard fix an overexposed photo (such as one created with flash). A light box and lighting set up can kick your photos up a notch as well, and I'm hoping to invest in some of these myself next year!
The day this photo was taken it was raining:
 |
| The rain created a beautiful gloomy lighting that suits the mood of this photo. |
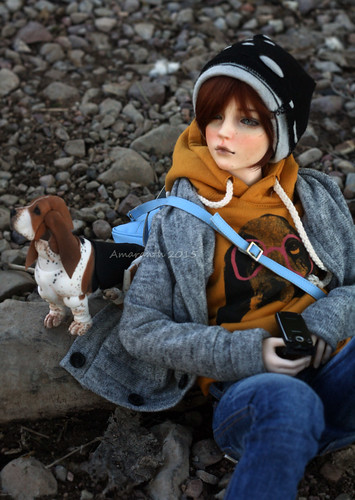
This day I was in my house and used my cellphone's camera:
 |
| Indoors in not very good lighting with my cell camera. |
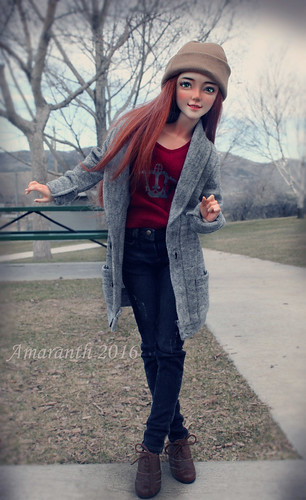
This day was overcast but not raining, and I used my cellphone camera:
 |
| Outdoors in fantastic lighting with a cellphone camera. |
Backgrounds:
You don't have to have the expensive backdrops and dioramas unless you want to for your photos. You can get creative with interesting textures found around your house, like this weathered wood here:


You can use a sheet or piece of scrap book paper or other interesting prints behind your doll to give it a soft but interesting background. By slightly blurring the backgrounds you'll get a very nice effect. The most important thing is that your background be clean. Tidy up the space. Remove objects that shouldn't be in the photo, make sure there is no trash or pet hair on the ground around your doll. It only takes a few minutes and really improves the look of the photo.
I prefer going outside. Usually the lighting is great, plus there's super interesting things to use for background images. Pay attention to proportions and angles.
Proportion and Angle:
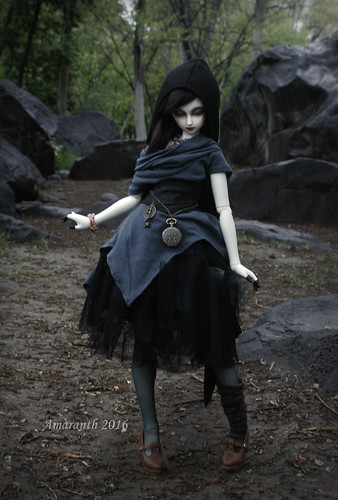
To make your doll look more in scale with their surrounding environment, angle and proportions are key. If you take a photo with a human size shoe in the background, your doll is going to look small. If you get down low below the doll's line of sight, you'll make the horizon look farther away and your doll taller and more human-like. It depends on what your goal for the photo is, whether to make your doll seem like a small person dwelling in a giant world, or a normal human in a normal sized world.
Don't be afraid to get down and dirty and contort into strange positions for the sake of a good photo! Have fun and be creative. You never know when you might snag THE shot.
 |
| See how she looks so tall and human like? |
Posing:
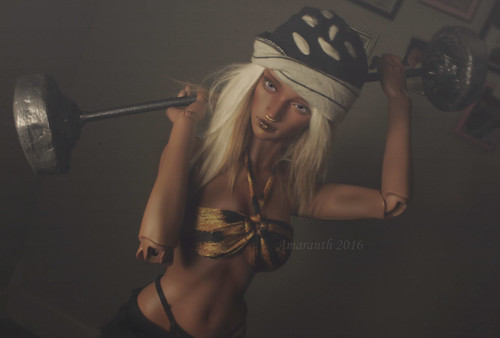
Posing is tricky and probably deserves a post all to itself. Those who know me and photography know that I'm damn good with posing dolls to make them do crazy stunts and look pretty realistic.
If you pose your doll stiff-limbed and awkward, they're not going to look very realistic. Humans rarely stand stiff and straight. A knee or elbow may be bent, hips cocked to one side. Work with your doll and the feeling you want your photo to convey.
My advice is to study pictures of real people and see how they're posing. When you go to pose your doll, work from the inside out. This mean, get the torso and hips how you want them. Then, lock the legs and feet until they're standing or sitting correctly. Then begin to focus on the shoulders, arms, and head. You'll have to tweak the feet and limbs a bit to ensure good balance, but generally I can get all my dolls to pose as you see in the photos without falling and without a dollie catcher. If you have the good luck to have someone who can be right nearby to catch your resin baby before it falls, take advantage of their help! I wish I had more people to come take photos with me!
Eye and Wig placement falls under this as well. Make sure the wig is positioned naturally, and that the eyes are positioned better. I have a post here on eye positions that might help (as a note to myself, I'm going to update this now that I've gotten even better at it!). Tidy flyaways so your doll looks natural and not electrocuted. It doesn't have to be slicked down and perfect- even humans have a little fuzz.
 |
| While a normal person wouldn't pose like this, it looks as if Elliot here was caught in motion, bending slightly, looking for something. |
Props:
Props aren't necessary but can really help. Just don't overdo them. Too many props that may not fit the mood can ruin an otherwise good photo. Have fun, just pay attention to the composition of the photo.
 |
| A good use of props. Just enough to convey the scene and contribute to the verisimilitude. |
The 2/3 Rule:
The general photography rule is that the main subject of the photo should take up Two-Thirds of the photo frame. Iphone cameras have a built-in grid that really helps with this, and you can put a grid in most editing software to help you crop the photo so it looks right.
For an example, in this photo Elliot takes up two thirds of the photo, and the dog takes up a bottom portion. He's not the main subject, and because Elliot only uses up two third your eye is drawn to her.
I'm sure there are exceptions to this rule, but I've found that my composition really improved when I started paying more attention to this.
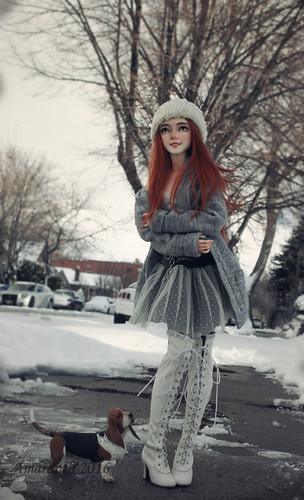 |
| The Two-Thirds Example, plus another view of good angles and posing. |
Okay, so those are my super basic, general tips for taking photos. I'm not an expert, but I think it's obvious how much I've improved, so I hope that by sharing the things that I have learned you'll be able to improve too!
No comments:
Post a Comment
Thanks for reading! <3 I try to follow up on every comment my readers make.