NOTE:

I do not make, sell, or traffic in bootleg/recast dolls or any other product.

I do not provide information on where or how to buy them.

Any recast information on this blog is for information purposes only, for identifying recast products on the second hand market.


Showing posts with label tutorial. Show all posts

Monday, December 12, 2016

How to Care for a BJD Wig- WIP


I'll update this as I get more photos and tutorials together, so I'm marking this as a WIP for my own memory. 

Products

Generally speaking, be cautious about what products you put on a wig. You'll want to know whether the fibers are natural or synthetic, and what products will work and won't work on the wig.
  • Volks makes a neutral wig wax here.
  • Dollmore has a nice wig spray here.
  • I've personally used a little human hair gel and a few other products to tame wild hairs.
  • Don't wash a bjd wig unless you know that it has been sewn and not glued. If you wash a glued wig it can fall apart!
  • Store your wigs in a wig net when not in use; this will protect them from damage.
  • Keep a ball of tissue or other paper inside the wig to help it hold its shape.  
  • Be careful to avoid products with oils in them that might sit for too long on the doll's resin and stain or ruin that area.

Heat Styling
  • You can boil heat resistant fibers and scrunch them into curls. Don't use this method on non heat resistant synthetic fibers or on glued wigs. I've used this method on vinyl dolls and for Ginny Doll restoration and had great results.
  • Flat Irons/Curling Irons should only be used on heat resistant fibers. You can use these on most natural fibers as well, but be sure to test all wigs underneathe where any damage won't be seen just in case.

Wet Styling

  • For most wigs, you can use a spray bottle to lightly wet the fibers of the wig and then wrap the sections around a tool, like a pencil or straw. When the hair dries you'll have a curl.
  • You can use this to set most styles, not just curls.

Reminder though, if the hair is glued, be sure not to get the wig cap wet!

Combing
  • Don't brush curly wigs! You'll end up causing the curls to separate and end up with a fuzzy mess like this:
  • If you must tidy a curly wig, boil the wig and scrunch the hair back up, or manually redo each section of curl with a wet styling method.
  • Long wigs will tangle even when just sitting pretty. Comb them very gently with a wig comb, wire doll hair brush, or your fingers. Start at the ends and work your way up. Be as gentle as possible to minimize the loss of fibers.

Removing Sheen

Got a synthetic wig with too much shine? Never fear! Follow these steps to reduce the shine and give it a more natural, and expensive look.

  • First, get yourself some hair spray. (I've been lazy and used MSC, but I don't recommend this as it's expensive. If you do use it, wear a respirator.)
  • Remove the doll's wig and place it on something else, like a soda bottle.
  • Spray the hair with a light mist of hair spray and sprinkle baby powder or talc on top. Comb it through gently. Comb and shake the wig to remove excess baby powder.
  • Repeat as needed.
  • The baby powder will stick to the fibers of the wig and reduce the shine.

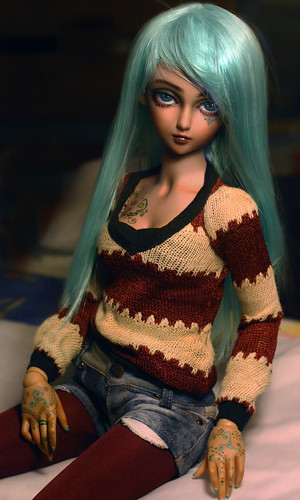
This technique took this wig from Kemper:

http://kemperdolls.com/wigs/modacrylic-wigs/althea-turquoise-modern-wig.html


And turned it into this:
Brictom

I hope this basic little guide is handy. If you want any more info or have any more questions about wigs, rooted hairs, or fibers, feel free to ask in the comments.

Thanks for reading!

Sunday, August 14, 2016

BJD Photography Tips and Tricks Part 1: Basics


Upcoming:
Part 2: Editing Photos
Part 3: Working with a Cell Phone Camera

My photography has improved over the years I've been in this hobby. Witness this monstrosity from early in my doll collecting career vs this more recent photo:
On the left is a photo of my first doll, Poe. On the right is Peregrine, who I acquired last year.
So what improved? How can you kick your photography up a notch? What if you only have a cell phone to work with?

Well, read below for help editing photos in general. A follow up post regarding tips and tricks for cell phone photography is upcoming.

Monday, August 1, 2016

iDyepoly Review


Having now dyed a doll with both iDye and RIT I can confidently say I prefer iDye for most BJD applications.

The colors are less accurate, but deeper and richer than you'd think. I was not able to make blue actually come out blue, which seems to be a common problem based on my internet research.

I've never tried to get blue from RIT, but I know it can be done.

RIT dye is easier to work with. It's less temperamental, takes more dunks to get a deep rich color so you can more easily control the shade you're going to end up with, and while warm you can kind of blend the color together before the piece dries and the color sets.

However, RIT dye rubs off pretty easily. I've gotten the majority of RIT off a resin piece with little more than a Magic Eraser sponge with some acetone.

Pink RIT powder dye on Recast Aileen Doll Ashes (Minion)

Monday, December 23, 2013

Restringing Aileen Doll Ashes

Here is a tutorial for restringing an Aileen Doll Ashes. This guy is a recast, just to let you know so you don't share this where it's not welcome.

As usual, my disclaimer: Don't ask me where or how to buy. I don't distribute.

To start, I should note that I didn't do this right…when the tutorial says to put the wings on first, DON'T. Instead, do the arms first then the wings. My dragon's wing snapped because I put it on first.

Second note: You will use one piece of elastic to string both arms and the wings. I tried to take clear pictures of this, so if you need more explanation go ahead and comment here.

I haven't been checking emails due to anxiety (I hate dealing with email), so if you have emailed me, I'll get to it eventually, I promise!

Sunday, December 15, 2013

Another bjd dyeing tutorial- this time with LOTS of pictures

[Note blogger was being stupid and I can't seem to get rid of some of the weird linking. T___T]

Minion needed to be pink. I bought two boxes of RIT Petal Pink for this project.

Time needed: 1-3 hours
(Depends on your water to dye ratio, the size of your pot and amount of pieces you're going to fit in there, and how vibrant you want your color.)

Okay, so see this post here for materials and stuff. I tried to take much better pics this time.

Warnings:

  • This is pretty much permanent. I don't recommend this unless you're a fairly seasoned modder or have an easily replaceable doll just in case something goes wrong.
  • Someone asked me why their dye turned their doll a bizarre gray color- I don't have an answer for that, but I do think it either had to do with the metal in their pot or that the dye was old.
  • Some areas aren't going to take the dye evenly, and some will end up darker and lighter than others. How noticeable this is depends on how saturated your color is. You can usually hide this via blushing, but I think it adds character.
  • Wear and tear is going to happen, and the dye, just like paint, will wear away over time. You'll have to do touch ups on occasion if this bothers you.

Thursday, September 26, 2013

Restringing a Pipos Cheshire Cat with poses


My little helper here is Grimalkin. He needed to have his blushing touched up, and I thought a tutorial may be useful. Here goes!

First, you will need a length of elastic about 20in long folded in half and tied in a knot. Your mileage may vary, and you may need shorter elastic to get him tighter.

They are very top heavy, and benefit from sueding the head/neck area.

Monday, August 26, 2013

Face Up Tips: Lips

As you know, I'm still working on improving my techniques so I thought I'd share what I've learned. Here is my trick for lips.
I'm addicted to shimmer powders.
A little background on this head: She's a recast Volks SD16 Kira. Her original owner tried to blush her to match a yellow skin body, and despite all my scrubbing, I can't completely remove it. [Edit: I have since removed it and redone the faceup.] So, this is making one eyebrow look really goofy. Please ignore that for the sake of the tutorial.


1. Block out the face up colors. On the lips, dab some color in the middle on the bottom and on the sides of the upper lips. (For a more solid lip, dab color over the whole thing).

Monday, August 19, 2013

Restringing a Feeple 60


This tutorial is to show you how to string a Feeple 60 the way Fairyland does it. You could probably string them the normal way, but I prefer the FL way. I'm going to rehash some stuff from the F60/SDgr hybrid tutorial post, so if you read that don't be surprised to see some of the same stuff here. On we go!

Ok first of all, this is a pain in the ass. Probably a bigger pain in the ass than restringing a pukifee, no joke. You WILL want help for this, or else you be looking like a dork like I was doing this.

You will need two lengths of elastic for the body, both about 2ft 4 inches.

Each piece should be around 2 ft 4in.
Unstringing the body:

This was a surprise. F60s need two lengths of elastic, one for each side of the body. To remove the neckpiece, first remove the feet.

Tuesday, August 13, 2013

Feeple 60/Volks Lorina Hybrid


Ok first of all, this is a pain in the ass. You WILL want help for this, or else you'll be looking like a dork like I was doing this.


This first tutorial is to show how to remove the neckpiece on the F60 body and restring it so you can use it with another head.

Note the First: You will want help for this.

Note the Second: Also, I kinda messed up on this leg. You will actually want to tie the knot and leave it towards the torso. DO NOT untie it like I did or hold the knot at the bottom. It makes things seriously difficult.

Friday, August 9, 2013

Face Up Tips: Eyebrows


I'm still learning and improving my face up techniques. I'm not the best or anything, but I have figured out some things that help me with my face ups.

I <3 shimmer powders!!!
A little background on this head: She's a recast Volks SD16 Kira. Her original owner tried to blush her to match a yellow skin body, and despite all my scrubbing, I can't completely remove it all [edit: I finally got it off and redid her faceup]. So, this is making one eyebrow look really goofy. Please ignore that for the sake of the tutorial.

Here's my technique for eyebrows. Update: Scroll to the bottom of the post to see recent eyebrows done with this method!

Saturday, August 3, 2013

Restringing a Pukifee- My Technique


There is pretty much no information available on how to restring these little buggers, so I put together what I could find and took mine apart. I do not have a legit to compare to, so I'm just going off what few tutorials did exist and what owners of legit ones have said. This method I'm going to show you works really well for me, as you'll be able to see in the pictures, so hopefully it works for you too.

(Pardon for the messy background. That's my painting table so paint is everywhere.)

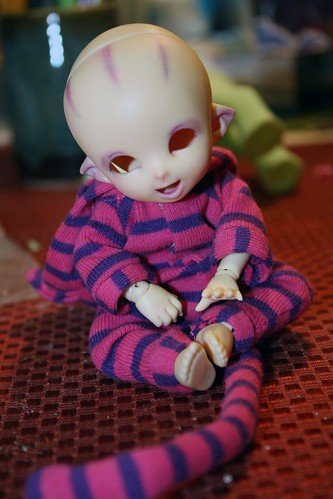
hiMy victim is Rumpelstiltskin ('Stilts), a Cheshire Cat Minion. Before this, he could barely sit upright. I'm not happy with the results of this restringing, but my fingers hurt too damn bad to do it again for awhile.

Stilts is a recast pukifee Pongpong from Steven.

NOTE: Make sure you keep the knot in the legs either in the shin or up in the hip area. DO NOT let it get stuck in the knee, like mine did. This will really make it a pain in the neck to pose.


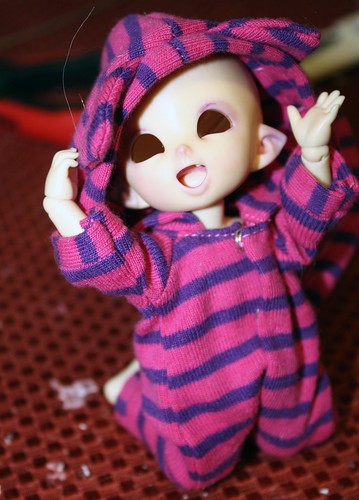
Pukifee Poses!!!

Click here for the pukifee restringing tutorial!

Note: After these, my knot got stuck up in Stilts' leg, so I couldn't do any cool one-legged pose. Those will be tried eventually! Enjoy for now~!

tada2

Tuesday, June 4, 2013

A Mostly-Text BJD Repair Tutorial


Sometimes dolls get cracked or broken. This sucks. Sometimes you can order replacement parts from the company, but other times you can't (you bought it second hand, too expensive, it's a recast, it's sold out, etc). You CAN fix your doll and make it good as new.

What you need:

Milliput or other Epoxy, Super glue, or epoxy glue
Tools to spread the milliput
fine sandpaper

Epoxy is amazing stuff. You can make pretty much anything out of it, you can sculpt it, modify it once it's dry, and paint over it.

Step 1:
Wash your hands, your work area, and your doll thoroughly. There is little worse than getting little bits of lint stuck in your epoxy after it's dried. Epoxy also best adheres to a clean, dry surface.

Saturday, May 11, 2013

Miniature Book of Shadows Tutorial


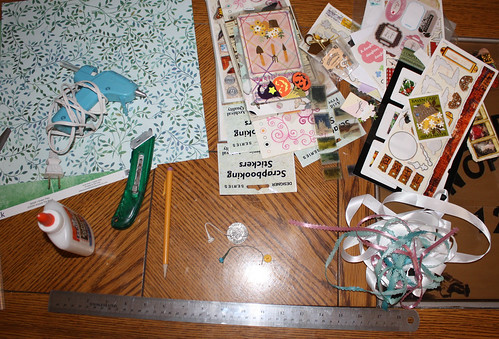
You'll need:

waht you will need

  • Cardboard (thickness is up to you, but I like to use corrugated cardboard)
  • Glue (Elmer's white glue or glue stick, hot glue or super glue or other strong glue)
  • Dark tea bag, steeped (but don't burn yourself!)
  • Match or lighter
  • Water
  • Decorative objects (flowers, scrapbooking materials, stickers, etc)
  • Printed pictures
  • Ribbons
  • Decorative paper and/or fabric
  • Stapler or thread and needle
  • Scissors
  • Ruler
  • Pencil

Tuesday, April 2, 2013

Sewing Tutorial: Minifee Sundress (Large bust, but can work for small bust)

Hi all! Sorry for the delays in posting. I've had a busy last few weeks (we're trying to buy a house and let me tell you, it is a pain in the butt), so I haven't been able to write anything. Here is a delayed but fun tutorial in time for spring for a Minifee Sundress (I'm sure this can be modified to work with any doll).

The minifee version of this pattern was inspired by an existing pattern called Robe Soleil, located at MHD Designs here. "This ensemble is based on a fashion pattern from MHD Designs." The originator of the pattern has asked to be credited, so there ya go!

This pattern is incredibly versatile. As the original creator noted, you can change the length of the skirt panels, add more panels, change the shape of the halter, add ruffles, hem the skirt, leave the skirt to fray, etc.

Tuesday, March 26, 2013

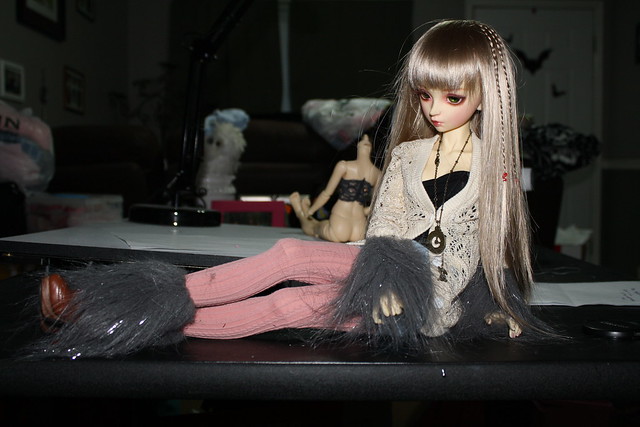
10 Minute Fur Arm and Leg Warmers


I have a guest post this week from Scarlet Study. She wanted to do a sewing tutorial for the first of my Tutorial Tuesdays (hey, it's still Tuesday!). This tutorial uses swatches of faux fur like those from Distinctive Fabrics online or from your local fabric shop. These arm and leg warmers are great for your ravers or scene kids. This tutorial is easily adjusted to work with other types of fabric or styles. 

Thanks Scarlet Study, and I hope you all enjoy. Now, on to the tutorial!


10 Min Arm and Leg Warmers


Wednesday, February 6, 2013

Restringing an SDgr Girl

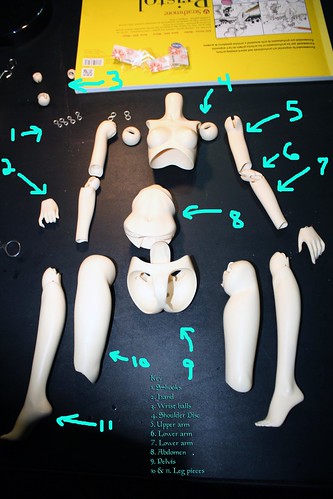
Hi all! Here is a photo-tutorial for how to restring a Volks Sdgr girl. For this tutorial I strung her with the heeled leg parts, but it's the same basic restringing principle. Our helper is Roslin, a recast SDgr Lorina, face up by me.

Tools:

For this tutorial, I used elastic, a thin cord to help guide the elastic through string channels, a hemostat, and s-hooks.

If you are restringing a recast, I suggest you get another set of s-hooks, as the ones the recasters send are not suitable and can limit movement (thanks to some bad hooks and too-thick string, one my girl's wrist balls snapped). I recommend going through Cool Cat on Ebay (I used D-sized and C-sized hooks in my Lorina). They were affordable and arrived relatively quickly.

Step 1: Unstring the Body

Here you will want to keep track of the pieces, especially which are the left and right sides. Volks marks the inside of most of the pieces with either an L or an R. Some pieces, like wrists and elbows, don't have markings. I haven't noticed a difference, so I assume there is no specific left or right versions and will work on either side.

Lorina Restringing


Friday, November 9, 2012

Restringing A Minifee

Okay, next in my line of restringing tutorials is the minifee tutorial.

Posing pictures can be found here.

Note:
If you are restringing a recast, please be a bit gentle, especially with the thinner areas near the ankles and whatnot.
Materials:

Standard restringing tools, like new elastic, calipers, a chopstick or pencil, a ribbon or cord, etc. An extra pair of hands will always make the job easier!

helping hands

Thursday, November 1, 2012

Restringing a Recast Littlefee (should also be compatible with legit littlefee)

Originally posted on Castaways here: http://castawaydolls.com//index.php?topic=2596.0

(Pictures have been removed from my Flickr for various reasons and hosted here, so Castaways thread may die.)

[Please excuse my tacky crumbling nail polish. I never seem to take photos when I have nice nail polish. I'm just classy like that. T_T]

Alright, so I'll be up front and say that this is only the second time I've strung a littlefee, and I'm not very good at restringing in general. I spent several hours pouring over other forums and any online pictures I could find of how littlefee are actually strung so I could fix my girl. So! There may be a few errors in here, and please feel free to correct them.

Note: Before you can restring a recast littlefee with the clicky pieces (and thus the way Fairyland does it), you will need to open up the spot for them in the pelvis. I was able to do this with an exacto knife (but you can also probably poke it through with a pencil or even a toothpick). Please keep an eye on the size of the opening you are making, and rest your clicky piece there often to make sure they aren't opened too big (mine are a tad too big).