NOTE:

I do not make, sell, or traffic in bootleg/recast dolls or any other product.

I do not provide information on where or how to buy them.

Any recast information on this blog is for information purposes only, for identifying recast products on the second hand market.


Showing posts with label stringing. Show all posts

Thursday, September 26, 2013

Restringing a Pipos Cheshire Cat with poses


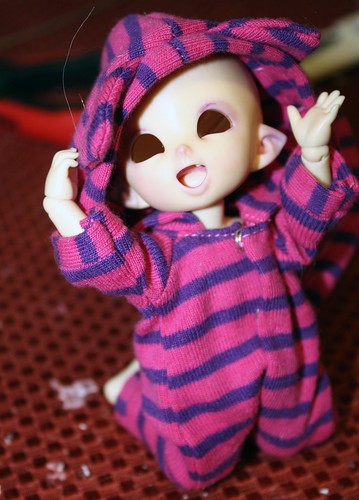
My little helper here is Grimalkin. He needed to have his blushing touched up, and I thought a tutorial may be useful. Here goes!

First, you will need a length of elastic about 20in long folded in half and tied in a knot. Your mileage may vary, and you may need shorter elastic to get him tighter.

They are very top heavy, and benefit from sueding the head/neck area.

Saturday, August 3, 2013

Pukifee Poses!!!

Click here for the pukifee restringing tutorial!

Note: After these, my knot got stuck up in Stilts' leg, so I couldn't do any cool one-legged pose. Those will be tried eventually! Enjoy for now~!

tada2

Monday, February 18, 2013

Restringing Soom Tiny Centaur


As promised, here is my Soom Tiny Centaur Restringing Tutorial. This is my first time restringing one, and I haven't gotten the tension exactly right for my tastes. Next time's the charm! Pardon my dirty nails; it's MSC from spraying the hooves.

As a note, this is a recast centaur. Please reserve judgment, but don't post the pictures anywhere recasts aren't welcome.

Step 1: Take the Centaur Apart

Wednesday, February 6, 2013

Restringing an SDgr Girl

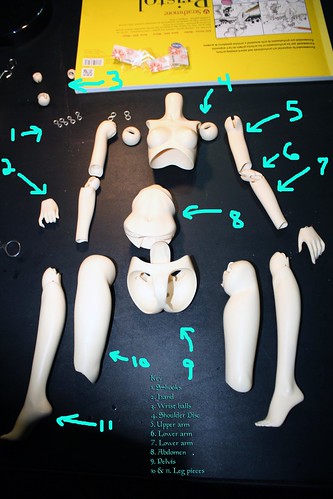
Hi all! Here is a photo-tutorial for how to restring a Volks Sdgr girl. For this tutorial I strung her with the heeled leg parts, but it's the same basic restringing principle. Our helper is Roslin, a recast SDgr Lorina, face up by me.

Tools:

For this tutorial, I used elastic, a thin cord to help guide the elastic through string channels, a hemostat, and s-hooks.

If you are restringing a recast, I suggest you get another set of s-hooks, as the ones the recasters send are not suitable and can limit movement (thanks to some bad hooks and too-thick string, one my girl's wrist balls snapped). I recommend going through Cool Cat on Ebay (I used D-sized and C-sized hooks in my Lorina). They were affordable and arrived relatively quickly.

Step 1: Unstring the Body

Here you will want to keep track of the pieces, especially which are the left and right sides. Volks marks the inside of most of the pieces with either an L or an R. Some pieces, like wrists and elbows, don't have markings. I haven't noticed a difference, so I assume there is no specific left or right versions and will work on either side.
Lorina Restringing


Friday, November 9, 2012

Restringing A Minifee

Okay, next in my line of restringing tutorials is the minifee tutorial.

Posing pictures can be found here.

Note:
If you are restringing a recast, please be a bit gentle, especially with the thinner areas near the ankles and whatnot.
Materials:

Standard restringing tools, like new elastic, calipers, a chopstick or pencil, a ribbon or cord, etc. An extra pair of hands will always make the job easier!

helping hands

Thursday, November 1, 2012

Restringing a Recast Littlefee (should also be compatible with legit littlefee)

Originally posted on Castaways here: http://castawaydolls.com//index.php?topic=2596.0

(Pictures have been removed from my Flickr for various reasons and hosted here, so Castaways thread may die.)

[Please excuse my tacky crumbling nail polish. I never seem to take photos when I have nice nail polish. I'm just classy like that. T_T]

Alright, so I'll be up front and say that this is only the second time I've strung a littlefee, and I'm not very good at restringing in general. I spent several hours pouring over other forums and any online pictures I could find of how littlefee are actually strung so I could fix my girl. So! There may be a few errors in here, and please feel free to correct them.

Note: Before you can restring a recast littlefee with the clicky pieces (and thus the way Fairyland does it), you will need to open up the spot for them in the pelvis. I was able to do this with an exacto knife (but you can also probably poke it through with a pencil or even a toothpick). Please keep an eye on the size of the opening you are making, and rest your clicky piece there often to make sure they aren't opened too big (mine are a tad too big).